Thursday, February 28, 2013

Pastor Ryan's Mexican Lasagna

This Mexican Lasagna recipe is from the Pioneer Woman, and I love this recipe because it makes tons of food, we cut it in half and still get three freezer meals out of it, and it is easy and delicious.  Aaron actually made this for us this time, which is such a treat, I love my hubby :).  Aaron and Owen gave it a 7, and Noah and I gave it an 8.  It's just such a great family meal, and if you want to do lots of freezer meals, this is the way to do it.  This stuff is great after being frozen, so we'll be having this after Jonah baby comes ;).  I also add less meat, and I often like to add an extra can of beans, just suggestions.  Here is the recipe and the calories/serving are 350 for 24 servings.

4 c Unprepared Rice
6 c(to 8 c) Low Sodium Chicken Broth/stock
4 whole (to 8) Tomatoes (up To You)
2 whole (to 3) Onions (up To You)
8 cloves (to 14 Cloves) Of Garlic (up To You)
Butter (I usually don't add this, but Aaron did)
Taco Seasoning (or Chili Powder, Paprika, And Cumin, I use this, not the packet stuff) To Taste
1 can (to 2 Cans) Black Or Pinto Beans (up To You)
3 pounds Lean Ground Beef
2 jars (16 Ounce) Salsa Verde
Flour Tortillas (I used 20 for the whole recipe)
3 packages (16 Ounces) Mexican Cheese Blend
1 jar (16 Ounce) Enchilada Sauce
3 cans Corn, Drained


Begin by preparing rice with chicken broth/stock. Once prepared, salt to taste.
Chop up tomatoes, onions, and garlic as small as you prefer. Saute in pan with a tablespoon or so of butter. Add approximately 3 tablespoons chili powder, and 1 ½ tablespoon of both paprika and cumin. Stir until nicely combined.
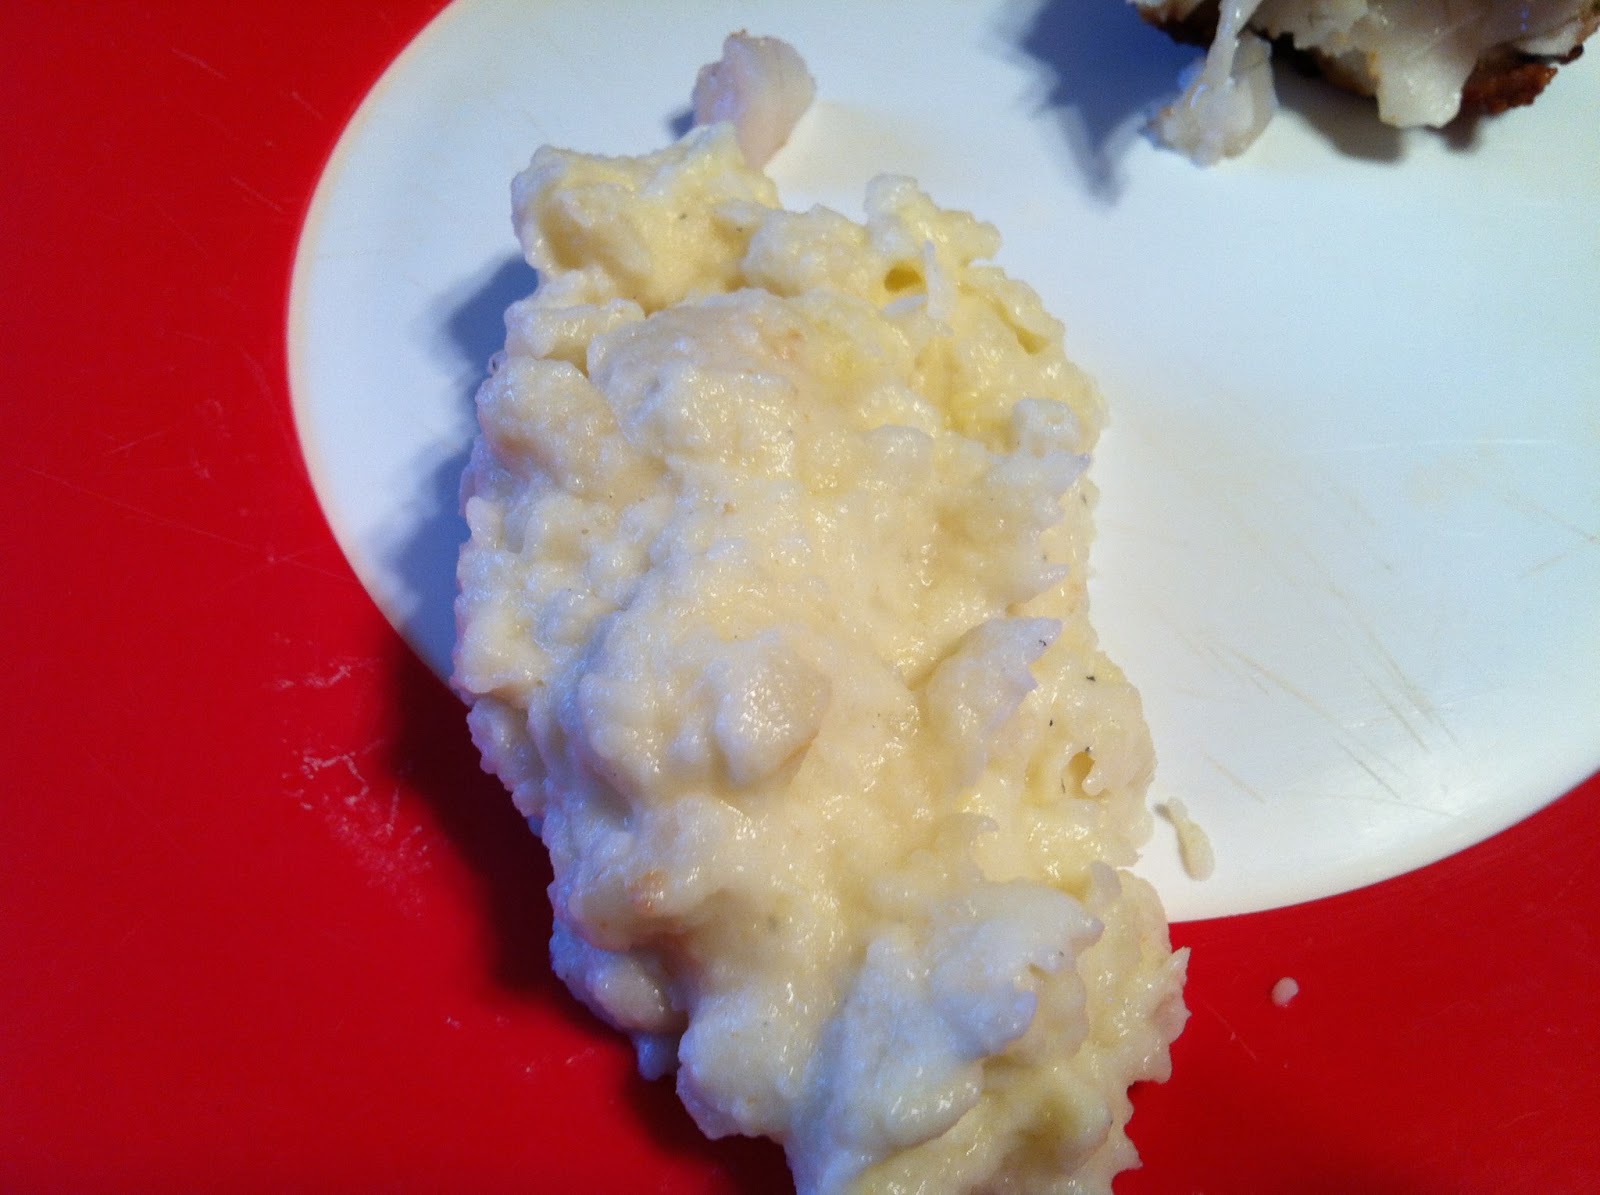
Feel free to add beans if you like them… no need to drain. Mix cooked rice together with tomato/onion/garlic mixture.
Brown the ground beef using about 3 tablespoons chili powder, 1 ½ tablespoon, paprika and 1 ½ tablespoon of cumin and salt to taste with about 4-6 ounces of water to create the taco beef.
Spread one container of salsa verde in the bottom of a large casserole or baking dish. Layer on tortillas covering salsa verde. Some overlapping is expected.
Divide your rice mixture in half and spread it over the layer of tortillas. Divide cheese in half and layer it on top of the rice layer. Approximately 24 ounces of cheese per layer.
Add another layer of tortillas on top of your cheese layer. Pour enchilada sauce over the tortillas and spread it out evenly.
Add layer of browned ground beef. Add 3 cans of corn (drained) on top of beef layer. Then the remaining amount of rice mixture on top of corn layer followed by the remaining jar of salsa verde, on top of which you will add the remaining cheese (approximately 24ounces) to the top…this is our final layer of ingredients. Sprinkle top with some taco seasoning or cayenne pepper.
Bake at 375ยบ for 25-35 minutes until cheese has melted and begins to brown a bit.

Wednesday, February 27, 2013

Smothered Pork Chops

I found this Smothered Pork Chops crockpot recipe at the blog 365 Days of Slow Cooking, and I also have it in her cookbook, which is a great crockpot cookbook.  This probably received the highest score of any crockpot recipes we've ever had, besides taco meat, so I was super happy.  Owen gave it an 8, Aaron and I gave it a 9, and Noah gave it a perfect 10.  He's been really happy with the meals we've had recently :).  The calories for 1 serving are 207, and we had this with corn and baked potatoes.  Yum!

4 slices crispy bacon, crumbled
1 onion, diced
1 T water
1/2 t brown sugar
2 garlic cloves, minced
1/2 t dried thyme
1/4 c flour
1/2 c chicken broth
2 T soy sauce
1 bay leaf
4 bone-in pork chops, dredged in flour, browned (about 1 minute on each side) and seasoned with salt and pepper (I didn't use bone-in, and I didn't dredge them in flour)
1 1/2 t cider vinegar
1 T dried parsley flakes (I didn't use this)

Place bacon in bottom of slow cooker.  Microwave the onion, water, brown sugar, garlic and thyme for about 3-4 minutes (stirring every minute) until onions are softened.  Stir the flour, broth and soy sauce into the onion mixture.  Pour into slow cooker and add in the bay leaf.  Nestle the pork chops into the sauce and cover and cook on LOW for 3-5 hours.  Transfer pork chops to serving platter and tent loosely with foil.  Remove fat from braising liquid with a large spoon.  Discard bay leaf and then stir in the vinegar and parsley flakes.  Spoon sauce over pork chops and serve.

Since I didn't dredge them in flour, and they were not bone in, we had more pork chunks rather than pork chops.  So rich and delicious, I will definitely be making this again!

Tuesday, February 26, 2013

Joe's Bread

 
Here is my family's favorite bread recipe that comes from my fabulous brother-in-law Joe.  He's a great baker, and he has tweaked this recipe to make it so it's incredibly delicious every time.  I used 5 cups whole wheat flour, and 4 cups all-purpose flour, and it is delicious!  I make this most of the time for our family, but I had run out of potato flakes last week, thus the different recipe.  This is approximately 150 calories/slice.  We all give this a perfect 10.
 
Joe’s Bread Recipe
 
Joe and Sonia
3 ½ cup warm water              5 T butter
4 tsp yeast                                 ½ cup honey
2 tsp salt                                    1/3  cup powdered milk (heaping)
 
½ cup potato flakes                             4 T wheat gluten
8-10 cups flour
Mix together water, yeast, and honey. Let stand until yeast is thoroughly dissolved. Add powdered
milk, butter, gluten, and potato flakes. Mix until uniform. Mix in salt (tastes terrible if you forget this...).
Add 3 cups flour and mix until uniform. Add remaining flour, 1 cup at a time, allowing each cup to be
completely mixed in–dough should not stick to sides or hooks when enough flour is added. Cover
dough in the bowl with dishcloth and let rise for 30 minutes. Punch down and remove from bowl.
Divide dough into 2. Knead dough several times and shape into rolls the length of the loaf pans. Put
into greased loaf pan. Put a cookie sheet on bottom rack of oven and cover bottom with water. Turn on
oven to lowest possible setting. Place loaf pans on middle rack. Allow 30-45 minutes to rise. Remove
cookie sheet and set oven temperature to 340F. Bake for 40 minutes or until crust is well browned.
Remove bread from pans and let cool.


Monday, February 25, 2013

Waffles with Butter Pecan Syrup

 
I found this recipe in Paula Deen's The Deen Family Cookbook, and I was really excited to try it.  This was a great recipe, but the Granola Waffles aren't really granola waffles, they just have granola on top.  Despite that, we enjoyed it, Aaron and I more than the boys, because funky syrup just doesn't sit well with them ;).  The syrup for 1/10 of the recipe has 179 calories in it, and the waffles have 156 calories for 16 waffles.  This is a great basic waffle recipe, and the syrup was yummy.  Aaron and I gave it an 8, Noah gave it a perfect 10, and Owen gave it a 7.  

Corrie’s Christmas Granola Waffles with Butter Pecan Syrup

Syrup:

2 T butter

1 c chopped pecans

1 c maple syrup

¼ t salt

Waffles:

2 c all-purpose flour

3 T sugar

1 t baking powder

¾ t salt

½ t baking soda

3 eggs

2 c buttermilk

4 T butter, melted

1 c granola

To make the syrup, melt the butter in a large skillet over medium heat.  Add the pecans and cook until fragrant, about 3 minutes.  Add the maple syrup and salt and cook, stirring constantly, for 2-3 minutes, until thickened.
       To make the waffles, heat a waffle iron.  In a large bowl, whisk together the flour, sugar, baking powder, salt and baking soda.  In a medium bowl, whisk together the eggs, buttermilk, and melted butter.  Pour the wet mixture into the dry mixture and fold to combine.
       Cook the waffles in the waffle iron.  Sprinkle the granola over the waffles and serve immediately with the buttered pecan syrup.

Saturday, February 23, 2013

Tzatziki Sauce

This is the Tzatziki Sauce I used for our gyros yesterday from Michael Symon's Live to Cook cookbook, and it is a good, simple, foolproof method.  I changed only a couple of things, because I like making things easy.  The calories are 31/serving, and I give this an 8, because it's just a good solid recipe.

2 c Greek yogurt
1 cucumber
kosher salt
Juice of 2 lemons
3 T chopped fresh mint (you could use dill as well, I like this recipe with the mint)
1 T minced garlic, about 3 cloves
1 T minced shallot, I used 1 small shallot
Black Pepper

Put the yogurt into a cheesecloth-lined strainer set over a bowl and let drain for 24 hours in the refrigerator (I didn't do this, I didn't think it was necessary, but if you want your sauce really thick, definitely do this).  Peel and dice the cucumber (I grated my cucumber to make is super fine, I didn't want my sauce too chunky).  Sprinkle it with salt and place in a strainer at room temperature for 2-3 hours to drain.
Stir together the yogurt, cucumber, lemon juice, mint, garlic, and shallot in a medium bowl until thoroughly combined.  Season to taste with salt and pepper.

Friday, February 22, 2013

Michael Symon's Roasted Leg of Lamb

We had Roasted Leg of Lamb tonight, and we found the recipe in Michael Symon's Live To Cook cookbook.  I have mentioned before, I love lamb, and this was a great recipe for it, full of flavor.  We made it into gyros with homemade pitas, and tzatziki sauce from Michael Symon which I will feature tomorrow.  The calories for the lamb were 155 for 6 servings, and I used a 3 lb leg of lamb.  Here's the recipe:

6 shallots, minced
4 garlic cloves, minced
1/4 c chopped fresh rosemary
2 T sugar
2 T coriander
2 T crushed red pepper
1 1/2 T kosher salt
1 leg of lamb (around 6 lbs, but I used 3 lbs)

Mix all ingredients together except the lamb, then rub it all over the surface of the lamb.  Place on a large dish, cover with plastic wrap, and refrigerate overnight.
Remove the lamb from the dish, rinse off the seasonings, and pat dry.  Let the lamb sit at room temperature for 1 hour.
Preheat the oven to 375.
Brown the lamb on all sides, then transfer the lamb, fat side up, to a roasting rack set in a roasting pan.  Roast until the lamb reaches an internal temperature of 140.
Remove the lamb and let it rest for 20 minutes.
Slice and serve.

Great and easy recipe, Noah gave it a perfect 10, I gave it a 9, Aaron gave it a 7, and Owen gave it a 6. 

Thursday, February 21, 2013

Sweet and Spicy Sausage Ragu

I found this recipe in Anne Burrell's cookbook Cook Like A Rock Star.  This Sweet and Spicy Sausage Ragu was a good recipe, and I made it because my family, especially Aaron, love sausage.  They didn't love it as well as I wanted them to, but it still went over well.  The calories for 1/12 of the dish were 340, and Noah gave it a perfect 10, Owen and I gave it a 9, and Aaron gave it a 7.  This was not too much work, just took a lot of time to cook.

2 onions, chopped
1 fennel bulb, chopped
2 celery ribs, chopped
3 garlic cloves, chopped
2 T extra virgin olive oil
Kosher salt
2 c tomato paste
2 c hearty red wine (I used beef broth with a little red wine vinegar)
1 lb sweet Italian sausage, casings removed (I used turkey)
1 lb spicy Italian sausage, casings removed
2 bay leaves
1 thyme bundle
1 lb spaghetti (I used shells)
1/2 c grated fresh parmesan

1. Put the onions, fennel, celery, and garlic in a food processor and puree to a coarse paste.
2. Coat a wide, deep pan with olive oil, add the pureed veggies, season with salt, and bring to a medium-high heat.  Cook the vegies until all the liquid has evaporated and they begin to stick to the pan--you want to brown these.  Stir occasionally to scrape up the brown bits, then let the crud form again.  It takes about 30 minutes.
3. When the brown crud has formed and been scraped down a couple of times, add the tomato paste, stirring to combine.  Let it start to brown a little and continue stirring for 2-3 minutes.  There's not much liquid at this point to keep things from burning, so be careful and move fast.  Add the wine, stir to combine, and scrape up any remaining brown bits; cook until about half the wine has evaporated, 4-5 minutes.
4.  Add both the sweet and the spicy sausage and using a spoon to break it up, cook until the meat is brown, 10-15 minutes.
5. Add enough water to the pan to cover the meat by about 1/2 inch.  Stir to combine well and add the bay leaves and the thyme bundle.  Taste, season with salt, and taste again.  Bring the sauce to a boil and reduce to a simmer.  Continue cooking, checking occasionally, for 3 hours, tasting, seasoning, and adding more water as needed.
6. During the last half hour of the cooking process, bring a large pot of well-salted water to a boil.  Add the pasta and cook.  Drain, reserving 1/2 c of  the pasta cooking water.  Remove the thyme bundle and bay leaves from the sauce.  Then remove half of the sauce from the pan and reserve.  Immediately add the cooked pasta to the pan with the ragu and toss to combine, adding more of the reserved ragu or pasta water if needed; continue cooking for another couple of minutes, until the past and sauce cling together and the liquid has reduced.
7.  Remove the pot from the heat and add the cheese.  Toss the pasta and sauce together and serve.

Wednesday, February 20, 2013

Slash and Burn Grouper (Rock Cod)

We had a great fish dish the other night, and we really liked it.  The calories per serving, the way the recipe is written are 237.  Noah gave it a perfect 10, I gave it a 9, Aaron gave it an 8, which is really high for him because he doesn't like fish, and Owen gave it a 6, because cod is fishier than he is used to.  I love that this is ready in 15 minutes, and so it's great for a busy weeknight meal.  I found this recipe in Michael Symon's Live to Cook cookbook, and I modified it a little, and we obviously didn't use all the sauce.  The picture is terrible, sorry :(

1 lb rock cod
1-2 T Jamaican Jerk Seasoning (I used less, since my kids don't like the spice)
1 t olive oil
Kosher Salt
1/2 c chicken stock
Juice of 2 limes
4 T unsalted butter, cut into pieces
1/2 green pepper, finely diced
1/2 c fresh cilantro leaves

Preheat the oven to 375.

Pat the fish and sprinkle the fish with jerk seasoning and salt.  Heat an ovenproof sautรฉ pan over medium heat, and when it is hot, add the olive oil.  Let the fish brown for 3 minutes and then gently turn them.  Place the pan in the oven for 3-5 minutes, until the fish has reached an internal temperature of 140.
Remove the pan from the oven and the fish from the pan.  Add the stock and lime juice to the pan, bring to a simmer, and reduce by half, 2-3 minutes.  Remove from the heat and whisk in the butter and then the bell pepper.  Pour over the fillets and garnish with cilantro leaves.

The cilantro tastes so good with this fish, and it's so fast and easy.  Love it!

Tuesday, February 19, 2013

Wheat Bread

Here is a recipe from Cook's Illustrated for easy sandwich bread.  I like making it wheat so that it's a little healthier.  Unfortunately, my house is cold, so my bread didn't rise like it usually would, but it was still really good.  The calories are approximately 150/slice for 16 slices and the rating on this is 8.  It's a good wheat bread, and really easy.  Here's the recipe

1 c whole milk (I used buttermilk)
1/3 c water, warm
4 T melted butter, cooled
3 T honey
2 c bread flour
1 1/2 c wheat flour
1/4 c wheat germ, toasted
2 1/4 t instant or rapid-rise yeast
2 t salt

Combine the bread four, whole-wheat flour and toasted wheat germ.  Whisk the milk, water, 3 T of the butter and the honey together in a liquid measuring cup.  Mix 3 1/2 c of the flour mixture, yeast and salt together in a standing mixer fitted with the dough hook.  With the mixer on low speed, add the milk mixture and mix until the dough comes together, about 1 minute.
Increase the speed to medium-low and knead until the dough is smooth and elastic, about 10 minutes.  (If, after 5 minutes, more flour is needed, add the remaining 1/4 c flour, 1 T at a time, until the dough clears the side of the bow but sticks to the bottom--I used about 1 1/2 T only.)
Turn the dough onto a clean counter and knead by hand to form a smooth, round ball, about 1 minute.  Place the dough in a lightly oiled bowl and wrap tightly with plastic wrap.  Let rise in a warm place until doubled in size, 1-1 1/2 hours.
Turn the dough out onto a lightly floured counter and gently roll into loaf form.  Place into an oiled loaf pan, wrap tightly in plastic wrap, and let rise in a warm place until it has nearly doubled in size and springs back slowly when indented with a finger, 1-1 1/2 hours.
Heat oven to 350 degrees.  Bring a kettle of water to a boil.  Brush the loaf with the remaining 1 T butter.  Set the loaf pan on the oven rack and place an empty metal loaf pan next to it.  Fill the empty pan about half full with the boiling water.  Bake until golden and the center of the bread register 200 degrees, 40-50 minutes.  Flip the bread out onto a wire rack and let cool to room temperature before slicing, about 2 hours.

This is a great, healthy bread, we love it for sandwiches.

Monday, February 18, 2013

Braised Chicken (Rabbit) Thighs with Olives and Orange


We had a very successful dish last week.  This one was incredibly successful, at least for three of us.  It's called Braised Rabbit Thighs with Olives and Orange.  We used chicken thighs, and they worked great.  Aaron and Owen gave this a perfect 10, I gave it a 9, and Noah was mad so he gave it a 2.  I wouldn't include his vote, so expect this to be great.  The calories for 6 servings are 285/serving, and then we included rice, so that's an extra 150 calories, approximately.  I found this recipe in Michael Symon's Live To Cook cookbook, and we're nearing the end of our Michael Symon recipes now :)  Here's the great recipe with the amounts I used.

4 bone-in chicken thighs
Kosher salt and black pepper
2 T ground coriander
1/2 c flour (I used less than this)
1/4 c olive oil
1 medium onion, halved and sliced
4 garlic cloves, sliced
1 fresno chile, seeded and sliced
1 c dry white wine (I used chicken broth)
1 c fresh orange juice
3 c chicken stock
12 black olives
1/2 c chopped parsley leaves
2 T honey
1 c toasted sliced almonds

Preheat the oven to 225 (I didn't do this, I totally spaced it :))
Place a dutch oven over medium heat.  Season the chicken thighs with salt, pepper and coriander, then dredge in flour and shake off the excess.  Add the oil to the dutch oven.  Brown the chicken thighs for about 2 minutes per side.  Remove the thighs.  Add the onion, garlic, chile, almonds, and a pinch of salt to the pan, and sautรฉ until the veggies and almonds begin to brown, 4-5 minutes.  Add the wine, orange juice, and sotck, making sure to scrape the bottom of the pan with a wooden spoon.  Return the thighs to the pan and bring the liquid to a simmer.  Cover the pan, transfer to the oven (I didn't do this, I just left this on the stove on low for 3 hours), and braise for 3 hours, or until the meat is very tender.  Remove the thighs from the pot.  (I shredded the chicken and removed the bones.)  Over medium heat, return the sauce to a simmer and whisk in the olives, parsley, and honey.  Return the thighs to the pot to reheat and then serve.

These are not that much work, although they do need to cook a long time.  It's so worth it, and we really liked it with the rice, since I made more sauce then I needed to.

Saturday, February 16, 2013

Italian White Bean, Pancetta, and Tortellini Soup

So we tried this soup the other night, and although I knew my kids weren't a big fan of soup, I decided to go with this anyway, because it's easy and filling.  I like that the Swiss chard added color and made it healthier, and I like that this came together so quickly.  I found this in Every Day Pasta by Giada de Laurentiis, a cookbook I checked out from the library.  I used bacon instead of pancetta, and I added double the beans and the tortellini, because I like my soups filling, not brothy.  We all gave this a 6, because it wasn't bad, it just wasn't anything special.  We had some garlic bread with it, and overall it was a good meal.
Italian White Bean, Pancetta, and Tortellini Soup
3 T olive oil
4 oz pancetta, chopped
3 large shallots, chopped
1 carrot, peeled and chopped
2 garlic cloves, chopped
1 15 oz cannellini beans, rinsed and drained
4 c chopped Swiss chard
6 c chicken broth
9 oz cheese tortellini
¼ t pepper
In a large, heavy soup pot, heat the olive oil over medium-high heat.  Add the pancetta, shallots, carrot and garlic and cook until the pancetta is crisp, about 5 minutes, stirring occasionally.  Add the beans, Swiss chard, and broth.
Bring the soup to a boil over medium-high heat, then reduce the heat to a simmer.  Add the tortellini and cook 5 minutes for fresh, 8 minutes for frozen, or until just tender.  Season with pepper and serve.

Friday, February 15, 2013

Risotto with Bay Scallops

Bay Scallops!  Who knew?  These are so much better than sea scallops for our family.  I was nervous trying this out, because I know Aaron doesn't like sea scallops, and I was afraid we were going to crash and burn.  This, however, was a huge success.  This was delicious, easy, and although requires a lot of stirring, it's risotto and totally delicious.  I have tried risotto before, and I didn't let it cook enough, because I was worried about over cooking it.  This time I didn't have that problem.  This was creamy and delicious.  We found this recipe in Michael Symon's Live to Cook cookbook.  Aaron and I gave this an 8, and the boys, who said it was their favorite rice ever, gave this a 9.

2 T olive oil
1 onion, mined
2 garlic cloves, minced
1/2 c diced prosciutto (I used bacon)
1 c Arborio rice
1 generous pinch of saffron
1/2 c dry white wine (I used chicken broth)
3-4 c chicken stock, kept warm
1/2 lb bay scallops
1/4 c sliced flat leaf parsley leaves
1 T unsalted butter
2 T grated Parmesan

Heat the olive oil in a 4 quart saucepan over medium heat.  Add the onion and sweat it for 2 minutes.  Add the garlic and sweat it for 2 minutes more.  Add the bacon and cook until it crisps, about 1 minute (I had to cook this longer than 1 minute so my bacon would crisp).  Add the rice and let it toast slightly in the hot fat, about 1 minute, stirring with a wooden spoon. 
Reduce the heat to low, add the saffron and wine, and stir continuously until most of the wine has cooked off.  Add 1 c of the stock and stir continuously until the liquid has cooked off, about 3 minutes.  Add another cup of stock and repeat the process.  Taste the rice.  Continue to add stock in 1/4 c increments until the rice is tender and the risotto is creamy.
Add the scallops and continue to stir for 2 minutes, or until the scallops are heated through.  Remove the pan from the heat and stir in the parsley, butter, and cheese and serve immediately.

Thursday, February 14, 2013

Chocolate-Chocolate Chunk muffins

Happy Valentines Day!  Here's a delicious muffin from Dorie Greenspan's Baking cookbook.  The boys and I really liked these, they gave them a perfect 10, and I gave them a 9.  Yum!  The recipe made 12 muffins, and each muffin was 240 calories.  I had to add a little more butter milk, about 2 T more than the recipe called for, because my batter was too thick without it.

3/4 stick (6 T) unsalted butter
4 oz bittersweet chocolate, chopped
2 c all purpose flour
2/3 c sugar
1/3 c unsweetened cocoa powder, sifted
1 T baking powder
1/2 t baking soda
1/2 t salt
1 1/4 c buttermilk
1 large egg
1 t vanilla

Preheat the oven to 375.  Butter the muffin pan and place it on a cookie sheet.
Melt the butter and half the chopped chocolate in the microwave.  Set aside.
In a large bowl, whisk together the flour, sugar, cocoa powder, baking powder, baking soda, and salt.  In a liquid measuring cup, whisk together the buttermilk, egg and vanilla.  Pour the melted chocolate and the buttermilk mixture into the dry ingredients, whisk gently to blend, not overmixing.  Add the rest of the chopped chocolate, then place the batter into the muffin cups.
Bake for about 20 minutes, then remove and cool for 5 minutes.  Serve.

These are a great sweet breakfast treat, and we'll have these again.

Wednesday, February 13, 2013

Corn Crepes with Barbecue Duck Confit

This recipe was great.  The crepes were delicious, the barbecue sauce was very interesting, and using already prepared duck confit was very easy.  The difficult part of this recipe was making the barbecue sauce.  You first had to make some spicy ketchup from scratch (ketchup from scratch, a first from me and so fun!), then make the barbecue sauce.  I'm not going to post those recipes, buy Michael Symon's cookbook Live to Cook if you're interested.  It was a little spicy, but really good.  Aaron and I gave this recipe a 9, and the boys gave it a 7, because it was spicy.  I used 1 ear of corn for the crepe batter, but everything else I just followed the directions.

Crepe batter:
1/2 c fresh or thawed frozen corn kernels ( I used 1 ear, boiled)
1/2 c all purpose flour
2 large eggs
1/2 c whole milk
1/4 t kosher salt
pepper
1/2 c coarsely chopped red bell pepper
1/2 c coarsely chopped green bell pepper
1/4 c coarsely chopped scallion, white and green parts
canola oil, for sautรฉing

Barbecue Duck Confit:
1 c shredded duck confit or alternate filling of your choice (I picked up some duck confit at my grocery store)
1 c coffee barbecue sauce
1/2 c sour cream for serving

Combine the flour, corn, eggs, milk, salt, pepper, bell peppers, and scallion in a food processor and puree until smooth.  Cover and refrigerate 2-4 hours.

Oil a pan, and warm over medium heat.  Ladle in some batter and cook over medium heat, then flip and continue cooking until cooked through.  Repeat.

Preheat oven to 400.

Wrap 2-3 T of duck confit with a T of sauce in each crepe to make a cylinder.  Arrange the crepes seam side down, in a baking dish.  Bake until heated through, about 10 minutes.  Garnish with sour cream.

We also added the corn salad to the crepes, and I didn't use the sour cream, because I don't like sour cream :)

Tuesday, February 12, 2013

Grilled Corn Salad

We had this grilled corn salad the other night, along with some delicious crepes.  I will post that recipe tomorrow.  Anyway, this comes from Michael Symon's Carnivore cookbook, his newest cookbook.  This is a great, fresh corn salad, but we didn't grill it since we don't have a grill, and it's cold right now.  I just boiled the corn on the cob like normal.  We liked this, Aaron and I more than the boys, we gave it an 8, the boys gave it a 6.  Here's the recipe:

4 ears of corn
salt
1 anchovy, minced
1 garlic clove, minced
1 jalapeno, seeds and ribs removed, minced
grated zest and juice of 3 limes
1/2 c extra-virgin olive oil
1 ripe Hass avocado, diced
1 c halved cherry tomatoes (I used 2 roma tomatoes)
6 scallions, white and green parts, thinly sliced
3/4 c chopped fresh cilantro

Cook the ears of corn.  In a large bowl, combine the anchovy, garlic, jalapeno, and a large pinch of salt.  Add the lime zest and juice and whisk in the olive oil.  Add the avocado, tomatoes, scallions, and cilantro and gently toss.  Over the bowl, cut the kernels from the cobs and add them into the salad.  Toss to combine, and season to taste.  (I liked mine with more salt, Aaron thought it didn't need anymore salt.)

I'm a dork, but I think it is so cool how an acid and an oil emulsify and make a really cool dressing.  I love that :)  Anyway, this salad would be better in the middle of the summer or late summer when all the veggies are super fresh, but this was still great.

Monday, February 11, 2013

Chicken and Dumpling Soup

For all of you experiencing cold snowy weather like us, this is a great, comfy, warming soup.  It's called Chicken and Dumpling soup, and it comes out of Michael Symon's Live to Cook cookbook.  This took time, because you have to cook the chicken first, then refrigerate for a few hours or overnight, then recook and add dumplings.  It really does have a great flavor.  The boys gave this a 7, because they aren't huge fans of soup, and Aaron and I gave it an 8.  I like that the dumplings were so light, not heavy and bready.  I will post the directions the way I made this.

Soup:
1 T unsalted butter
2 carrots, finely diced
2 parsnips, finely diced
1 onion, finely diced
1 celery root, finely diced
4 garlic cloves, minced
Kosher Salt
2 quarts chicken stock
1 whole chicken, about 3 lbs
2 bay leaves

Dumplings:
unsalted butter, if needed (I didn't need this)
1 c whole milk
1/2 t kosher salt
1/2 t pepper
1/2 t nutmeg
1 c flour
2 t chopped fresh tarragon
3 large eggs

To make the soup, add all the soup ingredients to a large crockpot and cook for 10 hours on low at least.  Let cool, remove the bones and shred the chicken, then cool in the fridge overnight.  When ready to serve, remove chicken fat and reserve, dump contents into a large soup pot, bring the soup to a simmer, then make the dumplings.
To make the dumplings, measure the reserved chicken fat.  You will need 1/2 c, and if you don't have enough, use butter to make up the difference.  Bring the milk and the fat to a simmer over medium-high heat in a saucepan.  Add the salt, pepper and nutmeg.  Remove the pan from the heat and add the flour, stirring with a heavy wooden spoon until the flour has absorbed all the milk and the resulting dough pulls away from the sides of the pan.  Add the tarragon and then the eggs, one at a time, stirring until each egg is incorporated.
Drop the dumplings into the soup in tablespoon sized amounts.  Simmer the dough for about 10 minutes, then serve when all is heated through.

Saturday, February 9, 2013

The Pioneer Woman's Apple Dumplings And Dorie Greenspan'sAlmost Fudge Gateau

 
I have two recipes to share today.  This first one is such a simple recipe, it's hard to even count it as a recipe :), but it's so worthwhile!  The recipe can be found here, and you have to try it!  I used ginger ale instead of Mountain Dew because I didn't want the caffeine. 

Apple Dumplings
 
2 whole granny smith apples          2 cans (8 oz. cans) crescent rolls

2 sticks butter                            1-½ cup sugar

1 tsp vanilla                           cinnamon, to taste

1 can (12 oz.) mountain dew soda

Peel and core apples. Cut each apple into 8 slices each. Roll each apple slice in a crescent roll. Place in a 9

x 13 buttered pan. Melt butter, then add sugar and barely stir. Add vanilla, stir, and pour entire mixture over

apples. Pour Mountain Dew around the edges of the pan. Sprinkle with cinnamon and bake at 350 degrees

for 40 minutes. Serve with ice cream, and spoon some of the sweet sauces from the pan over the top.


I made this for extra dessert for Owen's birthday, and it was a hit.  It received perfect 10s and 9s. 


We had Dorie Greenspan's Almost Fudge Gateau for Owen's Birthday Cake this year, because it's his favorite chocolate cake.  This cake also received 9 and perfect 10's.  This one requires more work, but it is definitely worth it.  I love how smooth and shiny the gateau comes out.  Yummy!

Almost-Fudge Gรขteau
5 large eggs
9 ounces bittersweet chocolate, coarsely chopped
1 cup of sugar
5 tablespoons unsalted butter, cut into chunks
2 tablespoons coffee or water
1/3 cup all-purpose flour
Pinch of salt

For the Glaze (optional)
4 ounces bittersweet chocolate, coarsely chopped
½ cup heavy cream
2 teaspoons light corn syrup

Getting Ready:
Center a rack in the oven and preheat the oven to 350 degrees F. Butter a 9-inch springform pan, line the bottom with parchment paper, butter the paper, dust the inside of the pan with flour and tap out the excess. Place the pan on a baking sheet lined with parchment or a silicone mat.
Separate the eggs, putting the whites in a mixer bowl or other large bowl and the yolks in a small bowl.
Set a heatproof bowl over a saucepan of simmering water and add the chocolate, sugar butter and coffee. Stir occasionally until the chocolate and butter are melted; the sugar may still be grainy, and that’s fine. Transfer the bowl to the counter and let the mixture sit for 3 minutes.
Using a rubber spatula, stir in the yolks one by one, then fold in the flour.
Working with the whisk attachment of the mixer or a hand mixer, beat the egg whites with the pinch of salt until they hold firm, but glossy peaks. Using the spatula, stir about one quarter of the beaten whites into the batter, then gently fold in the rest. Scrape the butter into the pan and jiggle the pan from side to side a couple of times to even the batter.
Bake for 35 to 45 minutes, or until the cake has risen evenly (it might rise around the edges and you’ll think it’s done, but give it a few minutes more, and the center will puff too) and the top has firmed (it will probably be cracked) and doesn’t shimmy when tapped; a thin knife inserted into the center should come out just slightly streaked with chocolate. Transfer the pan to a cooling rack and let the cake rest for 5 to 10 minutes.
Run a blunt knife gently around the edges of the cake and remove the sides of the pan. Carefully turn the cake over onto a rack and remove the pan bottom and the parchment paper. Invert the cake onto another rack and cool to room temperature right side up. As the cake cools, it may sink.

To Make the Optional Glaze:
First, turn the cooled cake over onto another rack so you’ll be glazing the flat bottom, and place the rack over a baking sheet lined with parchment or wax paper to catch any drips.
Put the chocolate in a small heatproof bowl.
Melt the chocolate over a pan of simmering water or in a microwave oven – the chocolate should be just melted and only warm, not hot. Meanwhile, bring the cream to a boil in a small sauce pan. Pour the hot cream over the chocolate and stir very gently with a rubber spatula until the mixture is smooth and shiny. Stir in the corn syrup.
Pour the glaze over the cake and smooth the top with a long metal icing spatula. Don’t worry if the glaze drips unevenly down the sides of the cake – it will just add to its charms. Allow the glaze to set at room temperature or, if you’re impatient, slip the cake into the refrigerator for about 20 minutes. If the glaze dulls in the fridge, just give it a little gentle heat from a hairdryer.

This is worth the work, and looks really impressive and tastes great.   Happy Birthday my Owen! 


Friday, February 8, 2013

Whipped Root Vegetables

We had these whipped root vegetables the other night, and we didn't love them :)  Owen gave them a 4, Noah gave them a 5, and Aaron and I gave them a 7, because they just weren't fabulous.  We found the recipe in Michael Symon's Live to Cook cookbook.  The celery root really overpowered everything else, so it just wasn't as appetizing as we would have liked.  Here is the recipe with the amounts I used:

Salt
2 potatoes
1 celery root
2 turnips
2 parsnips
2 sticks unsalted butter

Cook the peeled and chopped up vegetables in well salted water.  Boil until the vegetables are softened, and can be pricked with a fork easily.  Drain, then cook over low heat for 5 minutes to get rid of the excess moisture.  Put the veggies through a food mill (I don't have one of these, I just beat them with beaters, and they didn't smash up as well as I would have liked), and then add the butter and more salt to taste.  Serve.

Thursday, February 7, 2013

Crockpot Leg of Lamb

I love lamb, but unfortunately, not everyone in my family does.  Sigh...  We had this lamb for dinner on Sunday night, and it was worth it.  Yum :)  Aaron gave it a 6, I gave it an 8, Owen, Sean and Erin gave it a 7, and Noah gave it a perfect 10 :).  This is super simple, and I would've given it a higher score if I hadn't cooked it a little too long in the crockpot.  Here's what I did:

1 boneless leg of lamb
2 sprigs rosemary
2 lemons, juiced
5 garlic cloves, sliced
Salt and Pepper

Trim fat from lamb.  Cut slits in the lamb, and push garlic pieces into it.  Season generously with salt and pepper, rub with the rosemary, then put juice over it.  Cook on low for 5-6 hours (I cooked mine longer and it was too long), then serve.  I think some beef broth and tapioca added to the crockpot would give you some more moisture, and you could have a nice gravy at the end.  I'll try some more variations next time.

Wednesday, February 6, 2013

Allspice Crumb Muffins

These are really great muffins, and are very easy to make.  I have wanted to try them for a while, and so here we are.  They come out of Dorie Greenspan's Baking cookbook.  We all gave them an 8.
 
 
Allspice Crumb Muffins


For the Streusel:
1/2 cup all-purpose flour
1/2 cup (packed) light brown sugar
1/2 teaspoon ground allspice
5 Tablespoons cold unsalted butter, cut into bits 
For the Muffins:
2 cups all-purpose flour
1/2 cup sugar
1 Tablespoon baking powder
1/2 teaspoon ground allspice
1/4 teaspoon salt
1/4 cup (packed) light brown sugar
1 stick (8 Tablespoons) unsalted butter, melted and cooled
2 large eggs
3/4 cup whole milk
1/4 teaspoon pure vanilla extract
Grated zest of 1 lemon (optional-I didn't use this) 
Getting ready:  Center a rack in the oven and preheat the oven to 375 degrees F.  Butter or spray the 12 molds in a regular-size muffin pan or fit the molds with paper cups.  Alternatively, use a silicone muffin pan which needs neither greasing nor paper cups.  Place the muffin pan on a baking sheet. 
To Make the Streusel:  Put the flour, brown sugar and allspice in a small bowl and sift them through your fingers to blend.  Add the bits of cold butter and toss to get irregularly shaped crumbs.  Set aside in the refrigerator for the moment.  (You can make the crumbs up to 3 days ahead and keep them covered in the refrigerator.) 
To Make the Muffins:  In a large bowl, whisk together the flour, sugar, baking powder, allspice and salt.  Stir in the brown sugar, making certain there are no lumps.  In a large glass measuring cup or another bowl, whisk the melted butter, eggs, milk, and vanilla extract together until well combined.  Pour the liquid ingredients over the dry ingredients and, with the whisk or a rubber spatula, gently but quickly stir to blend.  Don't worry about being thorough--the batter will be lumpy, and that is just the way it should be. 
 
Divide the batter evenly among the muffin cups.  Sprinkle some streusel over each muffin, then use your fingertips to gently press the crumbs into the batter. 
 
Bake for about 20 minutes, or until the tops are golden and a thin knife inserted into the center of the muffins comes out clean.  Transfer the pan to a rack and cool for 5 minutes before carefully removing each muffin from its mold.

Tuesday, February 5, 2013

Bacon Wrapped Walleye

We had some really yummy fish the other night, and although we didn't buy the correct kind of fish, I bought walleye pike instead of walleye, some of us still enjoyed this.  Aaron and Owen shared one piece of fish, and Noah and I shared the other one, and I think Aaron and Owen's fish wasn't seasoned properly, because they said theirs was bland.  Oh well.  They gave it a 7, and Noah and I gave it a 9, because we thought it was excellent.  This is super easy, and just tastes great.  We got the recipe from Michael Symon's Live To Cook cookbook.

2 filets walleye
4 strips bacon
2 T butter
salt and pepper
2 t fresh thyme leaves
1 T olive oil

Salt and pepper the fish well.  Spread the butter on one side of both filets.  Add the thyme, then place the fish filets together, butter side down.  Cut the fish stack in half, so you have two equal sized pieces.  Wrap 2 bacon strips around each stack.  Place in the refrigerator for 1 hour.  Cook in a pan with the olive oil so bacon crisps up, about 4 minutes per side.  Place in a preheated 425 degree oven for a few minutes to finish off the cooking process.  Serve.

Monday, February 4, 2013

Hot Chocolate Chocolate Chip Cookies

 (original recipe found at this site)
I made some of these delicious cookies for Owen's birthday treats for school last week, and they were a hit.  We love these cookies, and Aaron awarded them a 10, which is a big deal :)  Owen gave them 10 as well, and Noah and I give them a 9.  These are never fail, easy to make, and everyone likes them.

Hot Chocolate Chip Cookies
 
2 sticks salted butter- at room temperature        1 cup white granulated sugar

2/3 cups packed light brown sugar       2 whole large eggs
 
1 tsp pure vanilla                               3-¼ cups all-purpose flour

4 packages (1 oz. Packets, not sugar-free) hot chocolate mix**

1 tsp salt                                           1-¼ tsp baking soda

1 cup each white, milk, and semi-sweet chocolate chips**

Heat oven to 350 degrees F. Cream butter and sugars until smooth. Beat in eggs and vanilla until combined.

In a separate bowl, combine flour, hot chocolate mix, salt and baking soda. Add to wet ingredients in 3 to

4 parts, making sure all is incorporated. Fold in chips. Chill the dough for an hour or so. Use a ¼ cup as a

scoop to scoop dough onto baking sheets lined with parchment paper. Bake for 9-11 minutes or until edges

are golden brown. Let cool for 5 minutes before removing from pan. **I added milk chocolate/peanut butter swirl chips instead of white

chocolate chips, and I used 5 oz hot chocolate mix rather than 4 and just substituted out some of the flour.


These are great, and fun since they taste kind of like hot chocolate :)

Friday, February 1, 2013

Red Velvet Waffles

We had a delicious dinner the other night, our usual breakfast for dinner, but it was a hit with the kids.  They were super excited about these waffles.  You can find the link here, and try them out for yourselves.  Owen and Noah gave them a perfect 10, and I gave them an 8, and Aaron gave them a 7, because he didn't think they were crispy enough.  I didn't make the Maple Cream Cheese Syrup, because I didn't have any powdered sugar, and I didn't want to waste ingredients, and I know I would've been the only one using the syrup.  So I just took some whipping cream, cream cheese, and sugar, and made a small amount of fluffy spread for me, and everyone else stuck with butter and syrup.  Anyway, here is the recipe from tastykitchen.com.

FOR THE WAFFLES:
1-½ cup All-purpose Flour
¼ cups Cocoa Powder
5 Tablespoons Sugar
½ teaspoons Salt
1-½ teaspoon Baking Powder
2  Eggs
1-¾ cup Whole Milk
6 Tablespoons Butter, Melted And Slightly Cooled
1 teaspoon Vanilla Extract
1 ounce, fluid Red Food Coloring (I didn't use this)

FOR THE MAPLE CREAM CHEESE SYRUP:
¼ cups Cream Cheese, Softened
½ cups Powdered Sugar
2 Tablespoons Butter, Softened
2 teaspoons Vanilla Extract
1 Tablespoon Maple Syrup
3 Tablespoons Milk (to Thin)

For the waffles:
 In a medium-sized bowl, mix together the dry ingredients (flour, cocoa powder, sugar, salt, baking powder) and whisk them to combine. Set aside.
In a large bowl, whisk together the eggs, milk, butter, vanilla, and food coloring until combined. Whisk in the dry ingredients to the wet ones until combined (the batter will have little lumps in it, you want that!).
Pour 1/2 cup batter in the center of the iron and close. Cook until the waffles are crispy and cooked through. Carefully remove the waffle, drizzle with maple cream cheese (recipe below).

For the maple cream cheese syrup:
Beat all the ingredients together until it forms a drizzling consistency. Drizzle over waffles and top them with chocolate chips, if desired.

These are worth it, they are fast and easy to prepare, and taste great.  We had these with scrambled eggs and fresh fruit, and like I said, they were a hit!!!